
Installing chimneys in the kitchen is the new norm in Indian modern households. Kitchen chimneys keep the kitchen clean and hygienic by removing smoke, oil and other particles and putrid odours from the air. Merely installing a kitchen chimney does not keep a kitchen clean and hygienic. Correct installation, ducting, electrical connection and position of the chimney play a vital role in how effective the chimney is in maintaining the kitchen. For these reasons and more, homeowners should not only consider the kitchen chimney, but also the installation of the kitchen chimney.
This comprehensive guide is designed to make potential installations of kitchen chimneys, including upgrades and new installations, as safe and easy as possible. When you purchase a Köche chimney, we offer expert installation services to ensure optimal performance and safety. However, if you're someone who loves DIY projects, you can refer to this guide for practical tips and step-by-step insights.
Preparing for the Installation of Kitchen Chimneys
Before planning your kitchen setup, it is essential to understand how a kitchen chimney works. Chimneys are designed to efficiently remove smoke, heat, and airborne grease, helping maintain a clean and healthy cooking environment.
They are powered by a motor and operate using powerful suction technology to eliminate smoke, burnt oil particles, odours, and excess heat generated during cooking. The suction speed can be adjusted based on the intensity of smoke and heat.
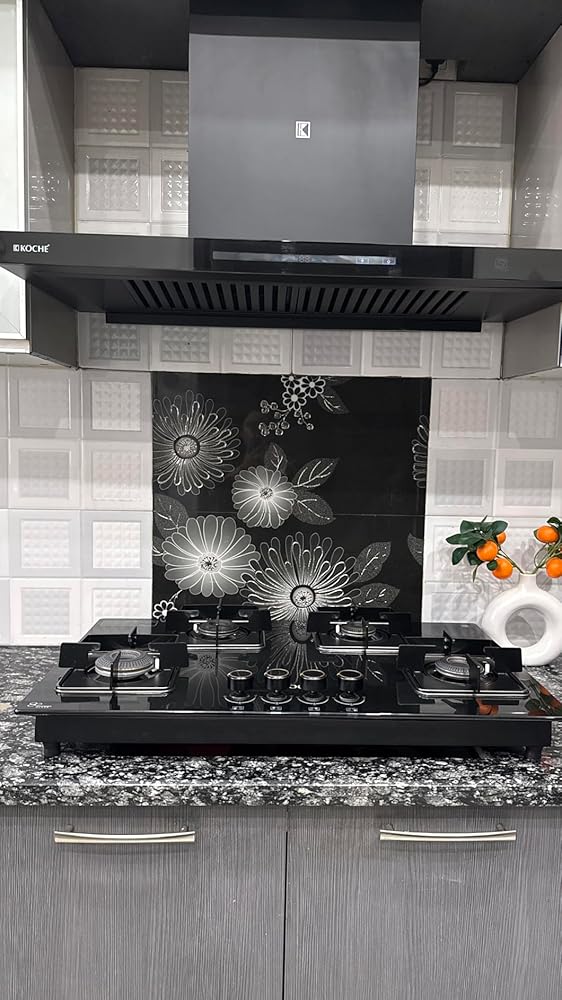
Köche chimneys are powered by advanced BLDC motors chimneys, with different models offering suction capacities ranging from 1450 m³/hr to 1650 m³/hr.
Types Of Chimney Models in Indian Homes
Ducted Models
- Channeling a chimney's ducting air to the outside is a requirement.
- Complete smoke and removal are more effective.
Ductless Models
- Where air is recirculated to the kitchen, clean air is returned.
- Simply use filters that trap grease and impurities.
What Model is Right for You
- Depends on kitchen layout.
- Measurements and positioning of the wall.
- Availability of an external outlet.
- The structural strength of the wall that will have the chimney.
Factors for Planning the Installation
- Distance measurements from the chimney to the cooking hob.
- Measurements of the wall for the support of the appliance.
- Strategic positioning to boost efficiency and lower servicing expenses.
Required Tools and Materials for Chimney Installation

If you want to make the kitchen chimney installation as easy as possible, use the best tools. The basic tools include:
- Drilling machines
- Measuring tape
- Brackets
- Screws
- Wall plugs
- Level markers.
Drilling entails the use of safety goggles and gloves as well.
For quality chimney fittings, you will need the:
- Right ducting, clamps, aluminium tape for external vents,
- Chimney model
- Insulation tape, a nearby socket, a voltage stabiliser, and other electrical components will be needed to complete the model.
The manufacturer’s accessories provide the best quality and durability. Ensure you have all the materials before you start to avoid delays and installation mistakes.
Ideal Kitchen Chimney Installation Height
For smoke absorption to be most effective, the proper kitchen chimney installation height must be maintained. The ideal measurement is usually 24 to 30 inches for electric or induction cooktops and 27 to 30 inches for gas cooktops.
If the chimney is installed too high, smoke may remain in the room, reducing its suction effectiveness. If the chimney is installed too low, there is a risk of excessive heat exposure, cooking interference, and safety concerns. The ideal installation height depends on the chimney’s shape, size, suction capacity, and the manufacturer’s guidelines. For example, in the case of slant chimneys like Köche Laura Chimney, the distance between the chimney and the hob is generally shorter.
With optimal installation height and proper chimney positioning, airflow is improved, greasy build-up on the cabinets is avoided, and cooking is unobstructed and comfortable.
Step-by-Step Kitchen Chimney Installation Guide
Step 1: Measure and Mark the Area
Using your measuring tape, mark the middle point of your wall and the width of the hob. The chimney needs to align with the cooking surface to be most effective. For the chimney to be the most effective, use an effective levelling tool to ensure your markings are straight.
Step 2: Fix the Mounting Bracket
Using your drill, make some holes where you made the markings and insert wall plugs. Mounting brackets will need to be secured for the chimney to have a stable and effective fit.
Step 3: Mounting the Chimney Unit
With the unit in hand, slot the chimney onto the bracket. When doing this, make sure that it is in the middle of the bracket and that it is clipped in. Before the screws are tight, check to see that it is still aligned with the hob.
Step 4: Installing the Chimney Pipe
With the duct pipe and the outlet aligned, extend the duct pipe to the external vent, making sure that both the length and the pipe are as straight as possible. Because the suction of the chimney is highly dependent on the straightness of the pipe, make sure to seal all joints that aren’t straight with aluminium tape.
Step 5: Installing the Electric Chimney
When doing the electric chimney installation, make sure to connect the power cord to an electric source that is properly earthed and has the correct voltage for the appliance. When doing all of this, make sure the wires are all in place to make sure there’s no exposed wiring.
Step 6: Chimney Testing
After all of that, it is time to test the appliance. First, you would need to make sure that the suction is working properly. Once the suction is working, you would need to check the sound that the chimney is making as well as the direction of the airflow. Lastly, you would need to go outside and make sure the smoke is going outside of the duct.
Mistakes to Avoid When Fitting the Chimney
It is common to see that people do things that minimise the effectiveness of the chimney.
- Avoid Installing the Chimney Too Low: Installing the chimney at an incorrect height can reduce its suction efficiency. Always maintain the recommended distance between the hob and the chimney for optimal performance.
- Ensure Proper Duct Installation: Avoid too many sharp or tight bends in the duct pipe, as this can restrict airflow. A straight, smooth duct layout improves overall efficiency.
- Seal Chimney Pipes Correctly: Improper sealing during chimney pipe installation can cause air leakage and grease buildup inside the duct, affecting performance and increasing maintenance needs.
- Check Wall Strength Before Mounting: Overlooking wall strength may cause the chimney to loosen over time, leading to safety risks and instability.
- Ensure Proper Electrical Earthing: Incorrect or poor electrical connections, especially lack of proper earthing, can create serious safety hazards.
- Follow Manufacturer Specifications: Adhering to the manufacturer’s installation guidelines ensures durable performance, safety, and long-term reliability.
Also Read: BLDC Chimney vs Conventional Chimney: Which One Should You Buy in 2026
Safety Measures for the Installation of the Electric Chimney
When an electric chimney installation is being conducted, safety is the priority. Make sure that it the power is turned off before touching any wires, and to avoid using extension cords, there should be a single socket near the chimney.
Best earthing practices will prevent appliance damage from electrical fluctuations. Ensure the wiring is insulated from heat and moisture. Avoid short circuits by inspecting plugs and wires regularly. The above pointers will not only provide safe use but will also increase the lifetime of the chimney.
Advantages of Buying a Kitchen Chimney Online
The increase in the popularity of buying chimney exhaust fans for kitchens from the internet can be attributed to the multitude of choices in products and the facilities to compare prices.
- Wider Product Selection: Online platforms offer multiple chimney types, sizes, designs, and suction capacities in one place.
- Easy Price Comparison: You can quickly compare models, features, and prices to find the best value for your budget.
- Access to Latest Designs: New and trending chimney styles are often available online before they reach local stores.
- Detailed Specifications: Product pages provide complete information about filters, suction power, dimensions, and energy usage.
- Customer Reviews & Ratings: Real user feedback helps you make informed purchase decisions.
- Convenient Shopping: Buy anytime without visiting multiple showrooms or spending travel time.
- Attractive Discounts & Offers: Seasonal sales, coupons, and combo deals can reduce overall cost.
- Doorstep Delivery: The appliance is delivered directly to your home, saving effort and logistics.
- Installation Support: Many sellers provide professional installation or easy booking for setup services.
- Easy Replacement & Return Policies: Online purchases often include flexible return options for damaged or incorrect products.
Maintenance after Chimney Installation
Cleaning grease and other substances from the filters regularly will ensure that the chimney lasts longer after the kitchen chimney installation.
The duct pipe should be kept clear of blocks for the chimney to function properly, and the outer surface should be kept clean using suitable cleaning agents.
The suction system of the chimney should also be cleaned as per the instructions from the manufacturer to reduce the noise and improve the efficiency of the chimney. This will increase the overall lifespan of the appliance.
Choosing the Right Brand: Köche
Buying a chimney from a trustworthy brand is very important when planning a reliable kitchen ventilation setup. Köche offers modern kitchen chimney solutions that ensure maximum suction, optimal filtration, and dependable performance.
All Köche chimneys are powered by advanced BLDC motors, delivering superior energy efficiency, quieter operation, and longer motor life. The heat auto clean function and filter-less design ensure easy internal cleaning and low maintenance. With Köche, customers benefit from easy installation and lasting peace of mind, making it a reliable choice for modern kitchen ventilation solutions.
Conclusion
To sustain a clean cooking environment, the proper installation of the kitchen chimney is a must. A clean chimney installation is dependent on precise measurements, firm mounting, and proper positioning of the chimney within the kitchen. Our guide might help you enhance your chimney to achieve the best suction, with a low frequency of cleanings and absolute safety.
By understanding how to install kitchen chimney systems, managing chimney pipe installation, and planning for realistic kitchen chimney installation cost, homeowners can avoid common errors and improve appliance efficiency. Attention to electrical safety, quality materials, and professional alignment enhances long-term performance. Whether you choose self-installation or expert assistance, a well-installed chimney significantly improves kitchen hygiene, comfort, and everyday cooking experience.
FAQ's About Kitchen Chimney Installation
Q1. Can I install a kitchen chimney myself, or do I need a professional?
Ans: You can install a kitchen chimney yourself if you have basic tools, proper measurements, and an accessible power point. However, for ducted models or complex wall drilling, professional installation is recommended to ensure correct alignment, safe wiring, and optimal suction performance.
Q2. How long does kitchen chimney installation usually take?
Ans: Standard installation typically takes 60–120 minutes, depending on wall material, duct length, and mounting complexity. If additional cabinet cutting, external vent creation, or extended ducting is required, the process may take longer.
Q3. What type of wall is best for chimney fitting?
Ans: A solid concrete or brick wall is ideal because it provides strong support for the chimney’s weight. If the chimney is installed on a wooden or modular panel, additional reinforcement brackets may be needed to ensure stability and safety.
Q4. Do I need an external outlet for every kitchen chimney?
Ans: Not always. Ducted chimneys require an external outlet to expel smoke outside, while ductless models use filters to clean and recirculate air inside the kitchen. The choice depends on kitchen layout and ventilation availability.
Q5. How often should I check the duct and fittings after installation?
Ans: It is advisable to inspect the duct pipe, joints, and mounting every 3–6 months. Regular checks help detect blockages, grease buildup, or loose fittings early, ensuring consistent suction efficiency and extending the chimney’s lifespan.
Share:
Kitchen Hob Buying Guide: How to Choose the Perfect One
How Köche Is Shaping the Future of Smart & Efficient Kitchen Appliances