
Introduction:
A lot of people, especially in India’s metro cities, live in rented apartments and flats where installing a ducted chimney or carrying out core cutting isn’t always possible. That’s where a ductless chimney can be a practical solution.
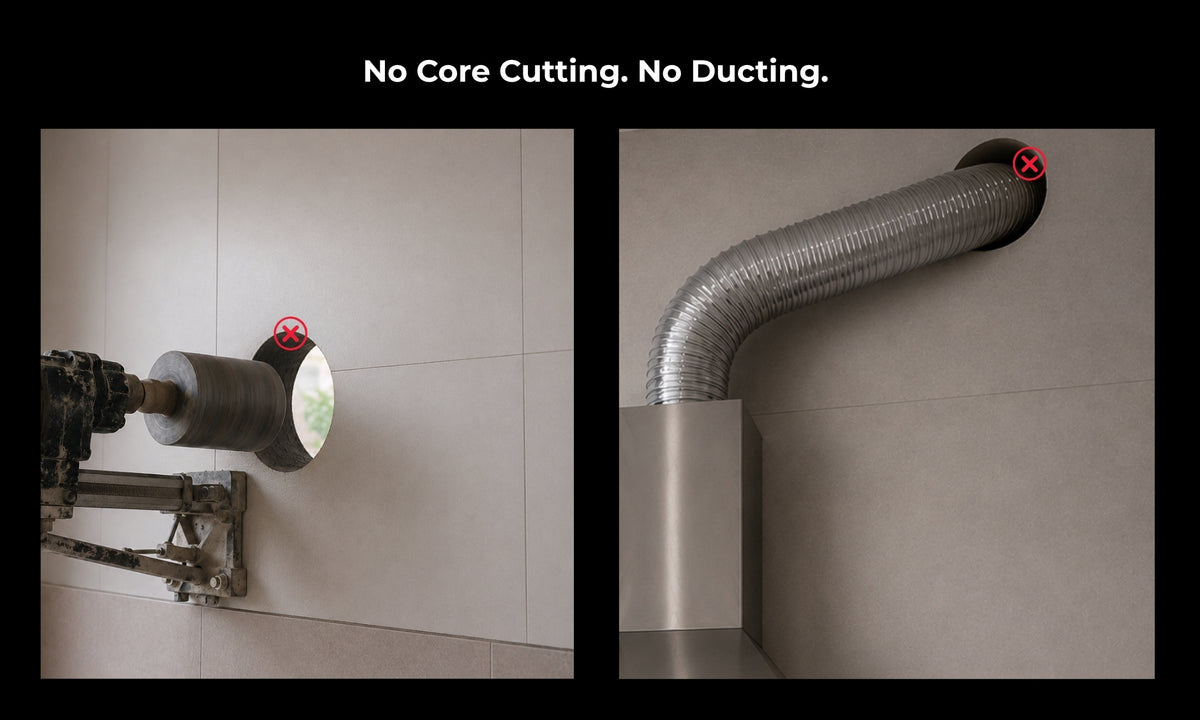
Ductless chimney installation is much simpler compared to a ducted chimney as it doesn't require any ducting or core cutting. In this step-by-step guide on how to install a ductless chimney, we’ll show you what to check before installation, how to mount the chimney correctly, and what to do after installation.
What Is a Ductless Chimney?
Before we get into the installation process, let’s first understand what a ductless chimney is and how it works. Unlike a ducted chimney that expels smoke and cooking fumes outside through a duct pipe, a ductless chimney filters the air and recirculates it back into the kitchen. It is designed to capture grease, smoke particles, and cooking odours through its filtration system, making it a practical choice for kitchens where ducting or core cutting isn’t possible.
How Does It Work?
The chimney draws in air containing smoke, grease, and cooking odours with the help of its suction system.
The air then passes through multiple filtration stages. Depending on the model, this may include a mesh or baffle filter to capture grease (at the bottom of the chimney), followed by a charcoal or carbon filter to help reduce cooking odours and smoke particles.
Once filtered, the air is released back into the kitchen, creating a continuous cycle without the need for external ducting.

Ducted vs Ductless Chimney Installation: Key Differences Explained

Ducted Chimney:
- Pushes cooking fumes outside through a duct pipe
- Requires core cutting through the wall
- Requires an external cowl
Ductless Chimney:
- Filters cooking air internally and recirculates it
- Does not require core cutting
- No external cowl required
Before You Start: Installation Preparation and Tools
Kitchen Ventilation:
Make sure the kitchen has windows, an exhaust fan, or another source of ventilation to maintain good airflow.
Choose the Right Location:
Position the chimney centrally above the cooktop to ensure effective capture of smoke.
| Check | Why it matters |
|---|---|
| Mounting height |
|
| Power socket nearby |
|
| Wall or cabinet strength | The mounting bracket supports the full weight of the unit, so ensure the wall or cabinet base is strong enough to hold it securely. |
Tools needed are minimal: a drill, a measuring tape, a spirit level, a screwdriver, and a stepladder. The mounting bracket, screws and instruction manual are provided with the chimney by the manufacturer.
Step-by-Step Ductless Chimney Installation
Mark the mounting position
Measure up from the centre of the hob or cooktop and mark the bracket position. (65-70 cm from the cooktop), using a spirit level to keep the line straight.
Fix the mounting bracket
Carefully drill the holes at the marked points, especially when working with tiles or delicate wall surfaces. Insert the appropriate anchors and screw the bracket firmly in place before hanging the unit.
Lift and hang the chimney body
Hang the unit securely on the bracket. Recheck that it is level and firmly fixed in place.
Fit the filters
Install the filters according to the manufacturer’s instructions, if they are not already pre-installed, and ensure they are properly seated and securely in place.
Connect the power
Before connecting the appliance, check that the power supply is not damaged.
Test suction and controls
Run through each speed setting, check that the controls respond correctly, and hold a tissue near the intake to confirm airflow.
After Installation: How to Keep It Running Well
- For Mesh or Baffle Filter Chimneys: Clean the mesh or baffle filters every month, depending on your cooking frequency. For households that cook daily or prepare oily, spice-heavy meals, weekly cleaning may be required to prevent grease buildup.
- Heat auto clean + oil collector tray: Regularly use the heat auto clean function (if available in your model), to remove built-up grease from inside the chimney. The melted grease collects in the oil collector tray, which should be removed, cleaned, and washed regularly.
- Charcoal or Carbon Filters: Replace the filters as recommended for your model and usage to maintain consistent filtration and odour control. If you notice that smoke and cooking odours are no longer being filtered effectively, it may be a sign that the filter needs to be cleaned or replaced.
- Exterior: Wipe with a soft, damp cloth and mild detergent. Avoid abrasive cleaners.
- Servicing: A twice-yearly periodic maintenance check helps keep suction and filtration performing well.
A Ductless Chimney Built for Easy Installation: Köche Port 60
If you’re looking for a ductless chimney for your kitchen, the Köche Port 60 Plug N Play chimney is a practical choice designed to make installation, operation, and maintenance easier. In addition to the benefits of a ductless design, the Port 60 features gesture control and heat auto clean, making it easy to operate and maintain.
Powered by BLDC motor technology, it delivers quieter and more energy-efficient performance compared to conventional chimney motors.
Conclusion
Installing a ductless chimney involves a few straightforward steps: getting the mounting height right, securing the bracket properly, fitting the chimney and filter correctly, and connecting the power. Unlike a ducted chimney, there’s no need for ducting or core cutting. Get these basics right, and you can have your ductless chimney installed quickly and ready to use.
Frequently Asked Questions
Do I need an electrician to install a ductless chimney?
Not necessarily. Most ductless chimneys run off a standard socket, but professional installation is still recommended for correct alignment and a safe electrical connection.
How long does a ductless chimney installation take?
Roughly 10 minutes, since there's no core cutting or duct routing involved. Most of the time goes into marking and drilling the bracket position correctly.
What height should I mount it at?
65-75 cm above the cooktop is the general range for a 60cm unit. Always confirm the exact figure in your model's manual.
Can I install it on tiles or near a window?
Yes, ductless chimneys can be installed on tiled surfaces, though it should be done carefully to avoid cracking. Installing near or on a window is also possible, but usually needs an additional support structure.
What if there's a gap between the unit and the wall after mounting?
Check the bracket alignment and re-tighten the locking screws. A visible gap can let unfiltered smoke escape, so it's worth fixing before regular use.
Are ductless chimneys suitable for Indian cooking?
Yes. Modern ductless chimneys with strong suction (more than 1200 m3/hr) and an effective filtration system can work well for Indian cooking.
Which is better: ducted or ductless chimney?
The right choice depends on your kitchen setup.
- Ducted chimneys are ideal when external ducting and core cutting are possible, as they expel smoke, grease, and heat outside.
- Ductless chimneys, on the other hand, filter and recirculate air internally, making them a practical choice for rented homes or kitchens where ducting and core cutting aren’t possible.


Share:
How to Choose the Right Chimney Size for Your Kitchen
What Is a BLDC Motor Chimney and How Does It Benefit Your Kitchen?